Hello friends and family of House of Art! I am gladly here to teach you all about how to make some lovely 3-D flowers like the ones on the layout below.
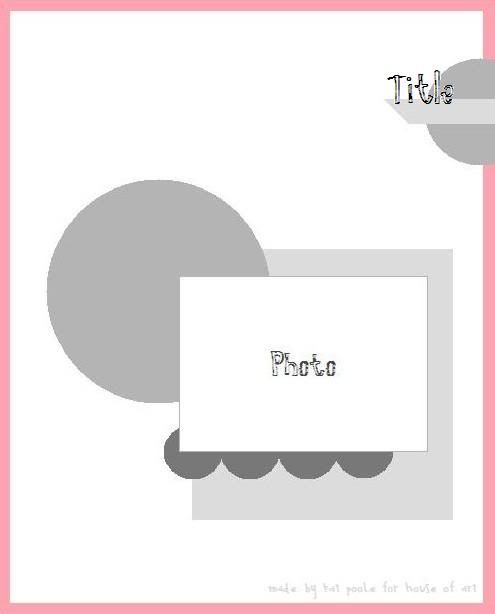
This layout is one I created using March’s kit Carnival Ride. The 3-D flowers are actually really simple to make. There's a few different ways to create them so let’s get started.
Here is what you will need:
- Patterned Paper/Cardstock
- Scissors
- Large Circle Punches/Scallop Punches (1.75" or larger)
- Adhesive (glue dots work great!)
- Optional: Sizzix Big Shot and 3D Flower Die.
First I am going to walk you through making the flowers with the Sizzix die-cut, since that is what I used for my layout. Doing it this way is only one way of creating the flowers, so don't panic if you don't have a Sizzix! I will show you other ways of creating these beauties as well.
Sizziz Die-Cut Method
I started out by running the die through the machine to cut scalloped spirals out of some of the paper from March's kit.
As you can see, I have 3 potential flowers in the photo above. The next step is to take the die-cut and start twisting/rolling it up from the outside in.
This is important: starting from the very outside will make gluing the final product a lot easier, so remember to start on the very outside of the spiral. See the photo above for some illustration. (I've been told that you can use a toothpick to help begin rolling the paper, but I found it was easier just starting the paper by folding/rolling it on its own. Do whatever works for you.)
Once you have it all rolled up you will take some adhesive (like I said, glue dots work great!) and apply it to the back of the flower. Don't be afraid to press down gently to make sure all the bottom edges get stuck to the glue dot. In the photo above, you can see what the finished flower looks like compared to what we started with.
For my layout, I created a cluster of these 3-D lovelies and applied them to the space below the photo and journaling.
As you can see, the flowers helped fill in the space and gave the layout a wonderful added texture. There’s so much more dimension on the page, and it is all thanks to these really simple 3-D flowers.
Circle/Scallop Punch method:
You can create the same effect using the circle/scallop punches, so grab some large punches and a pair of scissors and let’s give this method a try
1. Punch out a circle/scallop using your the punch of your choice. (Remember, larger circles work best, as the size of the finished flower is a fraction of the actual starting circle size.)
2. Pick any point on the outside of the circular shape and with your scissors begin cutting a spiral. See the photo below for illustration:
I went over my cuts with a green marker to show what I mean by a spiral; as you can see, I just started cutting from the outside and worked my way to the center of the shape. On the plain circle, I snipped of the pointed beginning I could begin rolling with a straight edge. Note: You will want to leave a good center so that gluing the flower is easier when you get to that point.
3. Once your spiral is cut, starting rolling the flower from the outside (just like I described in the Sizzix method). When you have it all rolled, apply a glue dot or adhesive of your choice and voila! Here is what the two different flowers look like side by side:
These little flowers are so fun to experiment with! Now that you know how to make them, try adding them to your next layout or project. I've even tried making these flowers out of fabric and felt and the results are to die for! The possibilities with these flowers are endless!! Thanks for letting me share this little technique with you. If you have any questions, leave a comment here or on my blog (taraleighgray.blogspot.com) and I will be sure to get back to you.