Thursday, March 31, 2011

3D Flower How-To with Taraleigh Gray

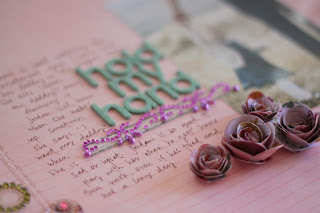
Hello friends and family of House of Art! I am gladly here to teach you all about how to make some lovely 3-D flowers like the ones on the layout below.
This layout is one I created using March’s kit Carnival Ride. The 3-D flowers are actually really simple to make. There's a few different ways to create them so let’s get started. 

Here is what you will need:
  • Patterned Paper/Cardstock
  • Scissors
  • Large Circle Punches/Scallop Punches (1.75" or larger)
  • Adhesive (glue dots work great!)
  • Optional: Sizzix Big Shot and 3D Flower Die. 
First I am going to walk you through making the flowers with the Sizzix die-cut, since that is what I used for my layout. Doing it this way is only one way of creating the flowers, so don't panic if you don't have a Sizzix! I will show you other ways of creating these beauties as well.

Sizziz Die-Cut Method
I started out by running the die through the machine to cut scalloped spirals out of some of the paper from March's kit.
As you can see, I have 3 potential flowers in the photo above.  The next step is to take the die-cut and start twisting/rolling it up from the outside in.
This is important: starting from the very outside will make gluing the final product a lot easier, so remember to start on the very outside of the spiral. See the photo above for some illustration. (I've been told that you can use a toothpick to help begin rolling the paper, but I found it was easier just starting the paper by folding/rolling it on its own. Do whatever works for you.)
Once you have it all rolled up you will take some adhesive (like I said, glue dots work great!) and apply it to the back of the flower. Don't be afraid to press down gently to make sure all the bottom edges get stuck to the glue dot. In the photo above, you can see what the finished flower looks like compared to what we started with.

For my layout, I created a cluster of these 3-D lovelies and applied them to the space below the photo and journaling.
As you can see, the flowers helped fill in the space and gave the layout a wonderful added texture. There’s so much more dimension on the page, and it is all thanks to these really simple 3-D flowers.
Circle/Scallop Punch method:
You can create the same effect using the circle/scallop punches, so grab some large punches and a pair of scissors and let’s give this method a try
1. Punch out a circle/scallop using your the punch of your choice. (Remember, larger circles work best, as the size of the finished flower is a fraction of the actual starting circle size.)
2. Pick any point on the outside of the circular shape and with your scissors begin cutting a spiral. See the photo below for illustration:
I went over my cuts with a green marker to show what I mean by a spiral; as you can see, I just started cutting from the outside and worked my way to the center of the shape. On the plain circle, I snipped of the pointed beginning I could begin rolling with a straight edge. Note: You will want to leave a good center so that gluing the flower is easier when you get to that point.
3. Once your spiral is cut, starting rolling the flower from the outside (just like I described in the Sizzix method). When you have it all rolled, apply a glue dot or adhesive of your choice and voila! Here is what the two different flowers look like side by side:
These little flowers are so fun to experiment with! Now that you know how to make them, try adding them to your next layout or project. I've even tried making these flowers out of fabric and felt and the results are to die for! The possibilities with these flowers are endless!! Thanks for letting me share this little technique with you. If you have any questions, leave a comment here or on my blog (taraleighgray.blogspot.com) and I will be sure to get back to you. 

Have a lovely day!


Monday, March 28, 2011

Special Blog Event Hosted by Taraleigh Gray

If you read Saturdays blog post, then you already know that Taraleigh Gray will be hosting a blog event this Thursday the 31st!!  You may also recal the little hint I gave you about this blog event....and today I have another hint!!  Todays hint is..................3-D!!! so lets see here....we have the *hints* TEACH and 3-D...I wonder what is going to be going on this thursday!!! Stay tuned because I will give one more hint before the big day!

Saturday, March 26, 2011

Special Event Hosted By Taraleigh Gray!!!

House of Art designer Taraleigh Gray will be hosting an event here on this blog on Thursday the 31st!!  Want to know what she will be doing??  You will just have to come back on thursday and check it out!! Keep a look out this week for little hints about what is going to happen!  Okay, Okay...Ill give you guys one little hint to start off...and its only one word: TEACH!  Thats it....on monday I will give you all another little *hint*

Monday, March 14, 2011

March Kit Reveal/Housewarming Winner!!

Its finally time to announce the Housewarming Party winners!!

For the newsletter sign up the WINNER is.......

angeandjohn@yahoo.com
please email me at Ariana@HouseofArtkits.com with your address so I can get it in the mail!!

Second, I said I would be giving away some party favors!!The WINNERS I have chosen are:
If I dont have a last name, or there are multiple people with the name, I will add a description.

JULIE( you commented on the blog post that I asked a question about the manufacturer)
CARMEN PAULS
DONNA
VAL
SARAH
REBECCA IN MI

** Please note that these giveaways ar of the party favors (only two were shown in the example photos, the "Goody Bags" are giveaways to the 1st 5 subscriptions created)

Last, but not least, Im going to announce the winner of the BLOG HOP!!  This person was on the blogs each day of the HOP leaving lovely comments!! DRUMROLL PLEASE...............................

SCRAPENABLER!!!!


Finally to the full March Kit reveal!! I am pleased to share our Feature Kit "Carnival Ride" with you!! I hope you all love it and you can subscribe ($29.99 plus $9.99 S+H)to this kit on the HouseofArtkits.com Home page and you can subscribe or single purchase it on the kits page.


Thank you!!
Ariana Mangum

Last Day of Blog Hop and my Favorite Sneak Peek!!!

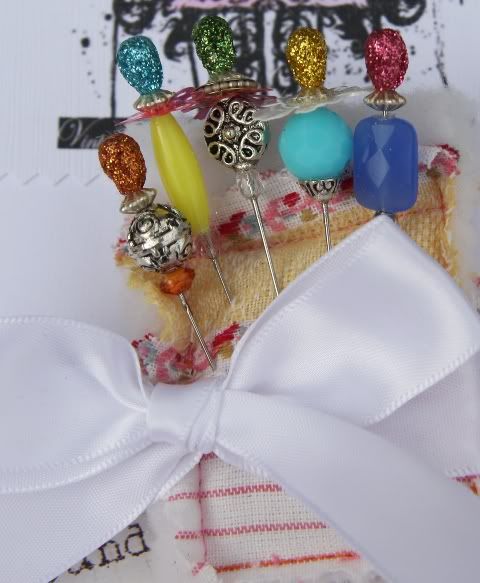
Hello Everyone! Today is the last day of the blog hop, so make sure to comment on Lisa Houpt's Blog! In order to be entered to win one of the mini kits, make sure you have left comments on all the designers blogs!  Todays SNEAKY is my absolute favorite element of the whole entire kit!! I think these Bad Girl Couture stick pins are rockin and they feature some authentic vintage/glass beads!  These were designed by Wendy Rago especially for me to go with my first kit as a gift, they will retail on the Bad Girls site for $14.99.  Wendy's talent and art has always been an inpiration, and because of that, I am where I am today artistically.  Thank you mom!!!  I hope all of you have enjoyed this Blog Hop as much as I have and be back here at 8pm PST to see the FULL kit reveal and ALL the contest winners from our lovely housewarming party!!

Sunday, March 13, 2011

Blog Hop/Sneak Peek Day 3!!

Can you believe it!! We are already on day three of our blog hop! We are 20 hours away from the last SNEAK PEEK and 32 hours away from the march kit reveal! WOOHOOOO :D To keep on schedule with the BLOG HOP, be sure to HIPPITY HOP on over to Kat Pooles Blog!! and comment under the SNEAKY POST.

Here is your little SNEAKY for today!
I hope everyone has a wonderful sunday!

Saturday, March 12, 2011

Blog Hop/ Sneak Peek Day 2!

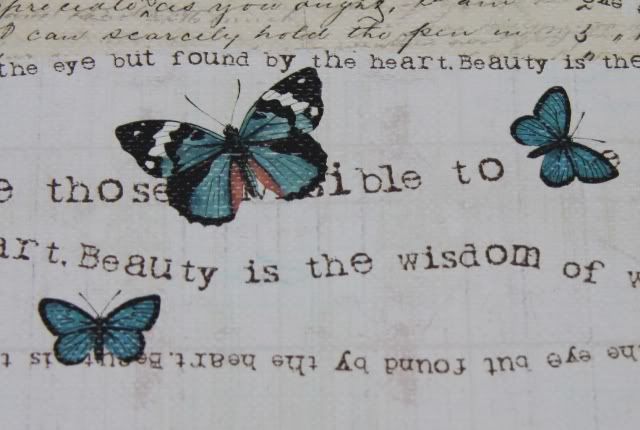
Day 2 of the Blog Hop already!! To stay on schedule with the blog hop, make sure to HOP on over to Taraleigh Grays Blog and leave a comment under her SNEAK PEEK post!! Geez...I can barely wait for Monday to show you all my favorite Sneak Peek of the bunch!  Today, I took a little clip of a patterned paper that is going to be in the kit.  I have been on a butterfly frenzy lately in my personal artwork, so when I saw this...I just had to get it!!  Two days down and two more to go!!

See everyone tomorrow!! Thanks for stopping by and joining us here for our Housewarming Party!!